
The South London Botanical Institute
The South London Botanical Institute (SLBI) is a museum of things botanical. We had an introduction to the institute by the warden who showed us drawings and specimens recorded for posterity in special containers.


From there we went into the library where the tutors introduced themselves after which the students did the same. After I had mentioned that I wanted to paint rocks with water-soluble gold paint, referencing the Japans practice of Kintsugi = fixing ceramic with gold, Claire came up with the idea using Lascaux acrylic gold – which I will have to try to get. because it is water-resistant when dry, I will have to wash it off the rocks pretty quickly after I have photographed it.
We were given several statements and had to write a response on the cards provided. We then went into the garden and collected 15 specimens which were connected with the statements.
In response to What are the weeds saying to you, I responded:

The items were not necessarily from weeds because, unless you know which plant is a weed, any of the plants could have been weeds depending on your definition of one. The Merriam-Webster definition of a weed is: a wild plant growing where it is not wanted and in competition with cultivated plants. In a place like a botanical institute, I suspect that all plants are cultivated and that weeds are, therefore part of the cultivated cannon.
We had to team up with someone and Caroline gave me her card which I put under the microscope and took a photo:

After a bring and share lunch – yet another feast, we were given free time to do what we liked related to what we had heard / seen / done before lunch with the added option of making a dye.
I decided to make a natural dye using a recipe which evolved as I went along:
Recipe:
Ingredients:
1 T crushed clay; 1 T ash; a few crumbs (+/- 1t) of something from a compost heap;
3 T water from the wet clay bucket; 6 black rose hips; 4 black seeds from a plant used to make other dyes (found in the garden); 2 drops of a thick fruit cordial concentrate found in the kitchen; 1 t vinegar – I thought this would dissolve something in the plants; 3 fresh raspberries.
Method:
I first crushed the hard clay using a pestle and mortar. Then I added the items listed above in the order that they are listed – adding wet and dry ingredients when they were needed.
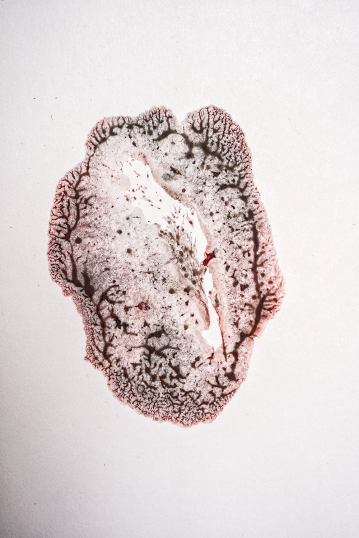
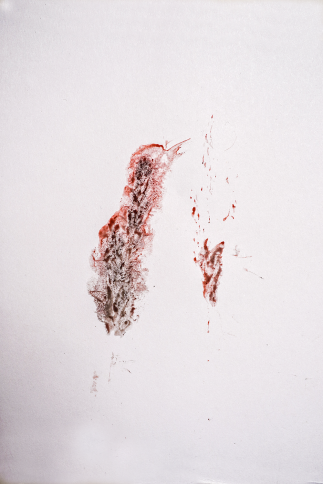
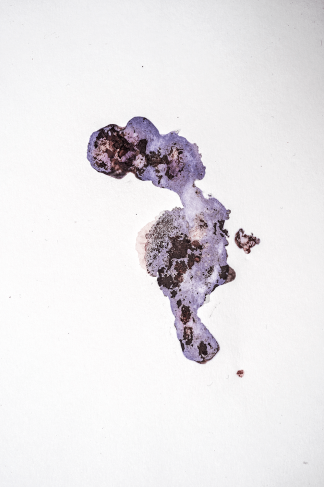
I loved the colour which emerged. Melissa suggested that I put some of the dye on a perspex plate and print off it. This I found very exciting as the outcomes depended on what was on the plate and on the pressure applied. There were inconsistencies in the dye with bits of un-crushed elements presenting their own problems to solve.
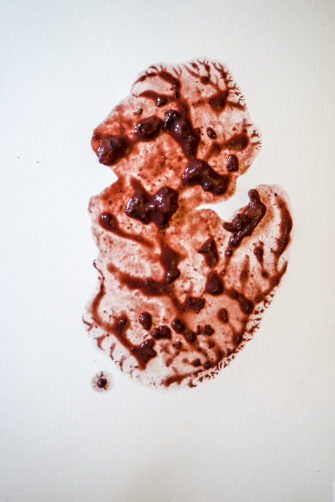
When I put this in my notebook to take home, the wet splurges created their own print when I closed the book:

These are some of the first prints I took and photographed after I had returned home, so the squashed bits would not have been visible at the institute:


I was conscious of applying different pressure on the card to create different accents on the card.


Overall, I found this the more exciting day of the two. The content was more focused and the space conducive to interacting with the others. I loved the creative bit with the dye and subsequent prints and their prints and photographing all the prints when I got home.
How this will relate to my current work, I do not yet know.
10th September, 2018
Yes I do:I have collected plant and mineral material from outside HMP Dartmoor and have made a dye from that and photographed the outcomes. I would like to include this as part of my exhibition to reflect ‘a sense of physical place’ . Sue Parr a drawing student in OCA SW has sent me an article on artist, Cea Blyth, who collects rocks and clay also from Princetown, where HMP Dartmoor is located, crushes the rock, adds walnut oil and makes her own pigment. She states:
“There is a natural affinity between the whole spectrum of earth colours, and this notion of pigments resonating with each other is most evident in my work Dartmoor Rainbow, which is painted with pigments collected only from within the high moor region. Starting with soft white feldspar glinting with quartz, picked up on a track above Postbridge, it is followed by a pinkish clay from an old arsenic mine behind Princetown. Next, sparkling blue-grey micaceous haematite from Kelly mine, near Lustleigh, then a cool creamy clay crumbling off root fibres by the path along the river Dart below Holne.”(2)
I am scheduled to go back to the prison later this month & I shall look for this clay to add to my next dye. I hope to collect dye material every season that’s left and see if there is a variation in the colours. I have the summer one as noted here.
There are interesting notes on dye making here sent to me by another student who attended the Environment and Art days, Gesa Helms.
Many thanks to OCA tutors Melissa Thompson and Dan Robinson for organising these really inspiring days.
Reference:
(2) https://www.resurgence.org/magazine/article3335-dirty-art.html
(3) https://www.citylab.com/life/2018/09/make-natural-ink-book-urban-foraging/568711/?utm_campaign=city-lab&utm_term=2018-09-04T11%3A00%3A19&utm_medium=social&utm_source=facebook&utm_content=edit-promo

I can tell how much you love experimenting. The dye you created worked beautifully.
LikeLike
Thanks, Catherine. It changes colour day by day &, for that reason, I keep my notebook shut. Because it was changing visibly while we were there, Melissa said she will send me the name of a colour fixative to stop the fading.
LikeLike
The prints are lovely. Grounded in process and place yet ambiguous.
LikeLike
Sorry about the delay in responding but I have only just received notification of your comment which I greatly appreciate, thank you. Yes, the verb ‘grounded’ is very apt as the base of the ‘dye’ is clay! I intend to make different ‘dyes’ in different seasons using a clay base but then also adding seasonal plant material rendering different colours. The print process will, I hope, remain as rooted to this process as I can.
LikeLike